Sunday, July 19, 2009

Yoga for Asthma Patients


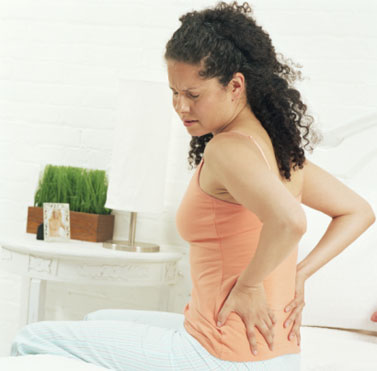
Asthma is a very common respiratory complaint, which involves a narrowing of the bronchial tubes (bronchi). The airways of the lungs are constricted, causing tightness in the chest, bouts of coughing, wheezing, and breathing difficulties. Thus, the normal ratio of inspiration and expiration is disturbed. Asthmatic attacks can be triggered by allergies, exercise, cold air, change of weather, pollution and stress related disorders.

It can affect the young, old and even children. The most disheartening aspect of asthma is that it does not get completely cured through medicines, but yes it can be controlled to a large extent by following certain simple yogic exercises. Yoga is a system which involves Asanas (body postures) and Pranayama (art of breath control). It is widely practiced to reduce stress related conditions, treat circulatory and respiratory disorders such as asthma and bronchitis, and improve over-all health. Thus, asthma is rather considered to be a disturbed breathing pattern than a disease.

Several researchers believe yoga as an alternate therapy to cure asthma. Yoga is an ancient Hindu discipline that uses postures and breathing techniques (pranayama) to increase lung’s airflow, air capacity, and stamina and reduce stress. Simple relaxation techniques also help to reduce stress regulate breathing patterns and also improve lung function. Yoga tries to cure asthma by cleansing the lungs of mucus, and making the patient emotionally strong so as to not react to stressful situations. Pranayam and yogic exercises are effective so as to restore the health of lungs and the respiratory system. The postures followed remove the mucus from the lungs, and relax the lung muscles. Yoga also teaches correct breathing techniques which are essential to keep the lungs free of mucus.

Yoga asanas with its gentle stretches and poses help one to gain flexibility and strength. Pranayama helps to focus on proper breathing, which is an integral part of all yoga exercises. It helps in breath control and helps one to stay calm during an asthma attack. The relaxation aspects in yoga help in calming the nerves.

A general yoga practice reduces stress, physical tension, and muscle tightness and increases overall feelings of well being by activating the nervous system. Here, we wish to bring out the some specific yogic exercises for the ones suffering from asthma –

DANDASANA:


This asana is effective for asthma. It improves digestion, tones the kidneys, stretches and activates the muscles of the legs. It also prevents tiredness in the feet by stretching the muscles of the feet.

Steps


  1. Sit with your spine erect and your knees bent. Position the blocks on their broad sides on either side of your hips. Then place your palms on the blocks. Sit on your buttock bones.
  2. Straighten each leg, one at a time, and join the inner sides of your legs and feet. Lengthen the calf muscles, and stretch your knees and toes. Keep your knees straight. Press your palms down on the blocks and stretch your elbows and arms.
  3. Lift your abdomen, freeing the diaphragm of tension. Hold the pose for 1 minute. Beginners may find it easier to separate their feet slightly, and should hold the pose for just 30 seconds.

BADDHAKONASANA :


This Asana stimulates the heart and improves circulation in the entire body. It tones the spine, and the abdominal and pelvic organs. Moreover, it alleviates sciatica and varicose veins.

Steps

  1. Sit on a bolster placed at right angles to your body. Place a side of your hips. Sit in Dandasana. Bend your knees and join both soles together. Pull your heels closer to the bolster. Beginners may find it easier to use a bolster positioned parallel to the hips.
  2. Push your knees away from each other and lower them gradually onto the blocks. Open out your chest and draw in the abdomen. Initially, hold the pose for 1 minute. Gradually increase the duration of the asana to 5 minutes.


VIRASANA :


It reduces inflammation in the blood vessels of the legs caused by standing for long periods. It relieves gout and rheumatic pain. It also tones the hamstring muscles.

  1. Place 2 cushions parallel to each other on the floor. Kneel on the cushions, keeping your knees together. Place the rolled blanket on your shins, and the folded blanket under your buttocks. Sit with your back upright.
  2. Keep your chest stretched out. Imagine you are squeezing your kidneys and drawing them into the body. Place your palms on your knees. Look straight ahead. Stay in the pose for 30 - 60 seconds.


TADASANA (Palm-Tree Pose):


This asana helps strengthen bronchioles and lungs; as well as build up muscles of the chest It helps to treat depression and improves incorrect posture. It reduces sciatic pain and prevents haemorrhoids.


  1. Stand bare feet on a smooth and even surface. Keep your feet together, with your heels touching the wall.
  2. Stretch your arms along your sides, with the palms facing your thighs, and your fingers pointing to the floor. Stretch your neck upward, keeping the muscles soft and passive.
  3. Distribute your weight evenly on the inner and outer edges of your feet, and on your toes and heels. Tighten your kneecaps and open the back of each knee. Turn in the front of your thighs. Tighten your buttocks. Pull in your lower abdomen, and lift your chest.
  4. Keep your head erect and look straight ahead. Breathe evenly and with awareness. Experience your body and mind as an integrated whole and feel the surge of energy. Stay in the pose for 30 - 60 seconds.

Shava Asana (Corpse pose):


Shavasana allows you to mentally reach out to every part of your body and help it to relax. Those who have tried this technique for the first time have been truly amazed at the sense of deep relaxation that this magical Asana induces. The best part is that it doesn’t involve any complicated procedures.

Steps

  1. It requires you to lie on your back with your eyes closed.
  2. Then slowly focus your mind on different parts of your body in order to make them relax.
  3. Concentrate on the breathing and enjoy the sense of deep relaxation.
Ustrasan (The camel pose):


This posture activates facial tissues, the nasal passage, pharynx & the lungs. It stretches the front of the body including the chest, abdomen, and quadriceps. It also improves spinal flexibility.

Steps
  1. Come up onto your knees. Take padding under your knees if they are sensitive.
  2. Draw your hands up the side of your body as you start to open your chest.
  3. Reach your hands back one at a time to grasp your heels.
  4. Bring your hips forward so that they are over your knees.
  5. Let your head come back, opening your throat.

Beginner can curl the toes under and come to the balls of the feet if one cannot reach the heels when the feet are flat, or use blocks on either side of the feet.

Simhasan (The lion pose):


It cures throat trouble, tonsillitis, activates the larynx, trachea and bronchioles. It also invigorates the thyroid cartilages. Muscles of the neck are excercised and the blood circulation therein is improved. The thyroid is also made healthy. Tonsilitis of certain types is checked.

Steps:
  1. Sit in Vajrasana.
  2. Now raise your buttock a little and cross the heel and toes of the right leg over that of left leg like a scissor.
  3. Sit on the heels and place both hands on the respective knees. Spread out the fingers. The hands on the respective knees should remain straight and the chest should be erect.
  4. Bring out the tongue as much as possible. At the time of bringing out the tongue exhale from the mouth with some sound.
  5. While returning back to the original position, take the tongue in, release the tension, loosen your hands and come back to the original position. Practice the exhalation process for few minutes.
Matsyasana (The fish pose):


It is commonly known as the ‘Fish pose’. It exercises the chest, tones the nerves of the neck and back. Performing the Fish Pose also expands the rib cage fully, increasing your lung capacity and aids in deep breathing. This asana corrects the disorders of the respiratory system as well as all organs concerned with respiration such as the nasal passage, the pharynx, the larynx.
Steps
  1. Lie on your back on the floor with your knees bent, feet on the floor. Inhale, lift your pelvis slightly off the floor, and slide your hands, palms down, below your buttocks. Then rest your buttocks on the backs of your hands (and don’t lift them off your hands as you perform this pose). Be sure to tuck your forearms and elbows up close to the sides of your torso.
  2. Inhale and press your forearms and elbows firmly against the floor. Next press your scapulas into your back and, with an inhale, lift your upper torso and head away from the floor. Then release your head back onto the floor. Depending on how high you arch your back and lift your chest, either the back of your head or its crown will rest on the floor. There should be a minimal amount of weight on your head to avoid crunching your neck.
  3. You can keep your knees bent or straighten your legs out onto the floor. If you do the latter, keep your thighs active, and press out through the heels.
  4. Stay for 15 to 30 seconds, breathing smoothly. With an exhalation lower your torso and head to the floor. Draw your thighs up into your belly and squeeze

The Asthma and Bronchitis patients must practice selected yoga asanas, pranayama regularly, and take proper diet. Thus, the practice of yoga helps to combat stress, reduce physical tension and muscle tightness. It activates the parasympathetic nervous system and feelings of well being are produced.
By regular exercise of Yogasana and Pranayama, the constriction of the bronchial tubes gets very much reduced. Slowly the capacity of bronchial tubes increases to a great extent. By this type of performance one can control the attack of asthma to a great extent and subsequently gradually asthma can be cured from the roots

Friday, July 17, 2009

Yoga for good eyesight


A popular saying goes “the face is the index of the mind and the eyes are the windows of the soul.

Moreover, the truth lies in the fact that ‘eyes’ are our only windows to the world. Human eyes need care and attention. As years go by, the muscles around the eyes lose their tone. Eyesight becomes weak after the muscles around the eyes lose their elasticity and become rigid, thereby reducing the power to focus different distances. In addition, tension around the eyes affects the brain causing stress and anxiety.

Eyesight is dramatically improved when the muscles of the eyes are relaxed. There is a deep correlation between the eyes and the mind. It is said that our vision occupies 40 percent of the brain's capacity. Therefore, when we close our eyes, relaxation is induced in the brain. Eye health corresponds to the level of relaxation it experiences.

Yoga plays a significant role in promoting eye health. Yogic eye exercises strengthen the muscles of the eyes and thus help in curing many ailments of the eyes. With yoga, people begin treating their eyes with care, which reflects in good eye health. Yoga exercises, which involve movement of the eyes and eye rotation helps to improve the sight of the individuals. Lifting the eyes up and down and blinking them while not at work serves as a great exercise for improving the eyesight of the individual.
Keeping eyes focused at one point helps in increasing the concentration of the individual. It also aids to increase memory power of people so that they can take up the daily chores with great responsibility with better devotion and dedication. The eye movements should be steady and one should feel relaxed and comfortable while practicing them.

Shavasana (The corpse pose)


Before beginning the eye exercises, the corpse pose helps to relax all the body parts as well as provide relieve to the eyes and mind.

  • To do this pose, one should lie motionless on the floor and close the eyes.
  • All the body parts from the toes to the head should be in a relaxed state.
  • In this relaxed posture, total calmness, and peace is felt when the whole body and mind have taken complete rest.
Trataka: Yoga for good eyesight


Trataka is a concentration exercise in which one gazes steadily at some small object without blinking the eyes and keeping the eye wide open. The practice is continued until the eyes strain and starts to water. Practice this exercise by gently closing the eyes and start rubbing the palms together, till the time heat is felt on the palms and then place them gently on the eyes. Trataka helps in preserving and maintaining good eyesight, and provides immunity from diseases.

  • Sit in Sukhasana or Vajrasana position to practice this exercise.
  • Keep the body erect and head steady and neck straight.
  • Keep the thumb in front of you about 12 inches away and the other hand on the respective knee.
  • Fix the eyes on the nail of the thumb.
  • Slowly move your right hand towards the end of your left shoulder, keeping the eyes on the thumb nail, eyes open don’t blink, do not move the head, only the eye balls. Hold the gaze for a few seconds without flickering.
  • Rub your palms till the time heat is felt, place cupped palms over eyes for a few seconds.
  • We will repeat this with the left hand by keeping the thumb of the left hand at a distance of 12 inches fixing the eye on the nail of the thumb.
  • Slowly move the thumb towards the right shoulder, keeping the eyes on the thumb nail, eyes open don’t blink, do not move the head, only the eye balls. Hold the gaze for a few seconds without flickering.
  • Rub your palms till the time heat is felt, place cupped palms over eyes for a few seconds

This exercise can be done till the eyes feel tired or start watering

Benefits: -
  • It helps in curing minor eye defects.
  • An effective exercise for the muscles of the eye
  • It also helps in concentration.
The renowned late William H. Bates, an ophthalmologist, claimed that vision could be improved with eye exercises like palming, eyeball rotations and gaze shifting. So, eye exercises are important to any individual and should be incorporated into the regular yoga routine to enjoy healthy vision for a longer period of time. Here are some easy and simple yogic exercises that can certainly help in improving your eyesight.

  • Rub your palms vigorously together till they feel warm. Then place your palms over your closed eyes, not putting any pressure on the eyeballs. When they cool down, remove them. The warmth from the palms will relax the nerves in the eyes and help in blood circulation.
  • Keep your face and neck straight. Close your eyes and rotate them clockwise, slowly and steadily concentrating on one eye at a time. Then rotate in the anticlockwise direction. Repeat five times each way.
  • Eye Stretching -Move both your eyes in upward direction and then downward direction. Blink them quickly to relax the eye muscles.
  • Open and close your eyes in quick, blinking motion. Repeat this 25-30 times and then close your eyes and allow them to rest for a minute.
  • Sun Bathe your eyes, however avoid looking directly at the sun. Let your eyes be the focus while performing this exercise. Look both sides, up and down , diagonally and try to stretch your eyes to allow more sunlight in your eyes

Yoga does help in improving your eyesight and maintaining a healthy vision. But you also need to take care of some general things along with practicing yoga such as eat healthy and balanced meals. Consume foods that are good for your eyes and boost their health like carrots, spinach, papaya, oranges, watermelons, grapes, dark green leafy vegetables, peanuts, almonds, etc. Drink lots of water, as your eyes need moisture to function properly and remain healthy. Insufficient water intake might lead to excessive dehydration that might cause a strain on your eyes so drink at least 6 to 7 glasses of water throughout the day. Our eyes need a lot of oxygen and proper breathing will ensure that your body gets the required supply. So you need to breathe correctly and fully.

Tuesday, July 14, 2009

Yoga for Back Pain Relief


Do you suffer from back pain? Have morning back stiffness? Tired of medicines and pain killers. No one else is able understand your extreme back pain. Finding no end to your pains and even your tolerance is getting away. Then, we have something to share with you.

Though in my twenties, I felt like being in fifties just because of the back pain. I could not go for morning walk with my husband, even used to miss all family functions and could not go for shopping. My house became totally dependent on servants. My bed and pain killers became my only source of life. Slowly I felt my husband and my children were taking their own ways leaving me in the darkness of my room. Finally, one day to my shock, I heard that my husband was seeing someone and my children had taken up bad habits. I felt that this pain was much more painful than my back pain. Thanks to one of my friend who showed me the way to yoga, which guided me to a new lifestyle and bring back my husband and children. Now, I regularly practice Yoga at home. Here, I wish to bring to light that back pain does not mean the end of healthy lifestyle, it can be totally overcome by practicing some effective Yoga asanas. Gentle yoga positions designed to stretch and strengthen your back can help miraculously.

Using yoga asanas for back pain is something that has been common practice for many years. Back pain can be due to many causes, but regardless of the cause, yoga asanas can usually help. A person looking into using yoga asanas should understand how they work and which ones are best for easing back pain. The back is an important part of the human body. It has many functions, including supporting muscles, protecting the spinal cord and protecting nerves. Injuries to the back are quite common. Most of the time, these injuries are related to muscles, and joints. Yoga asanas work to stretch and strengthen the muscles that support the spine and soft movements of yoga helps to prevent future injury.

A good, regular yoga practice will go far in relieving the stress and tension that sometimes cause mild back pain, and in fact, studies have shown that yoga is the number one most effective exercise for relieving back pain. Even medical doctors are starting to see the benefits and make recommendations to patients to try yoga. Yoga also helps to relax a person and help them relieve stress. Yoga asanas are a great alternative to medications and surgeries, but a person should always consult their doctor before beginning any exercise program to avoid further aggravation or injury. With a proper program, using yoga asanas for back pain reduction can be a great strategy.

Here are some of the best yoga poses for relieving back pain. Each pose should be held from five to ten seconds, depending upon your level of comfort, and should be done on a mat or other soft, supportive surface.

The Corpse Pose or Savasana


This Asana is helpful in releasing tension and relieving pain in the muscles of the back. In this pose, the body gets complete rest and the mind is at peace. 'Sava' means a dead body in Sanskrit and it is also called the relaxation posture. It revitalizes the entire body, takes away physical as well as mental stress and strain.

Steps
Lie flat on your back in a relaxed position, arms resting at your sides, palms facing up, and legs lying naturally, with knees turned out slightly.
If it hurts your back to have your knees turned outward, do this pose with knees bent, feet flat on the floor.
Close your eyes and allow all the muscles to relax.
Concentrate on each external limb of your body, starting from the toes till the head
Relax each and every part of the body and remain motionless
Breathe in and out while allowing any tension to leave the body.
Do this asana for 5-10 minutes.

Tad Asana


This Asana helps to stretch the spinal cord and is good for the muscles of the arms, shoulders and the neck.

Steps
Stand with your feet apart. Keep the arms at your side.
Inhale and lift the arms upward until the palms touch each other over the head.
The arms must be held straight.
Maintain this position for a few seconds.
Exhale and bring the arms back to the original position.
Repeat for a few times and relax.

Fish Pose (Matsyasana)


This targets the cervical vertebrae and relieves stiffness in the neck.

Steps
Lie on your back on the floor. Inhale.
Slowly tilt your head backwards until the back is arched and the crown of the head touches the floor.
The forearms and elbows can be used as support to assume the posture.
Breathing should be even.
Hold this position for 2-5 minutes and relax.
The Locust (Shalabhasana) - It targets the muscles of the back and helps to eliminate tension in the nerves.
Steps
Lie on the floor with the abdomen touching the floor and arms at the side; the chin should touch the floor.
Keep the heels and toes together, the fists should touch the floor.
Inhale slowly and lift the legs above the floor by applying pressure on the fists.
Hold this position for a few seconds and exhale.

CAT STRETCH


Steps
Start out on your hands and knees with a flat back.
Your hands should be directly under your shoulders with fingers spread. Knees should be directly under the hips.
Head is held loosely so that you are looking at the floor between your hands.
Inhale, and as you exhale, arch your back toward the ceiling, tuck your chin in to your chest so that you are looking at your navel, and tuck your tailbone underneath.
Hold, then release back into your original position.

BENDING FORWARD POSTURE:


Steps

Stand up straight with feet together and arms hanging loosely along your sides.
Breathe in deeply and raise your arms straight above your head. While breathing out, bend forward and touch your toes if you can.
If you can’t reach your toes, grab hold of your ankles or calves. To complete the pose, you should touch your head to your knees, but this may be too difficult for many who suffer from lower back pain.
Your movements during this pose should be smooth, not jerky.

These are only a few of the many yoga asanas for back pain relief that work great to strengthen and tone the spinal and abdominal regions.Give these gentle yoga poses a try but don't attempt them if your pain is acute and always remember to listen to your body. If something hurts, don't do it! Move slowly and gently—Being too aggressive can make matters worse. Always check with your health care provider before beginning yoga or any exercise program.

However, not all yoga poses relieve back pain, and some can in fact aggravate existing pain, so it is important to know which poses will be most helpful in relieving back pain. It is best to do these exercises under the supervision of a certified yoga instructor, and if you encounter any problems with these poses, you should consult an expert. Even just one or two sessions with a yoga instructor can help, as an instructor will help you with your form and posture during poses.When performing the asanas, try to be as alert and vigilant as your body moves in a particular manner, to the asana. Through practiced controlled stretching deep meditative techniques and controlled breathing the aches and pains of backs can be normalized. With the help of yoga you will be able to control your mind and get rid of stressful thoughts and tension that are more often than not, the culprits of nagging aches and pains, especially in the back and neck.

Visit Textbookonly.com for Books on Back pain Relief

Wednesday, July 8, 2009

Yoga For Growing Kids


As a parent, we all wonder to use the energy of our kids in activities which are an integration of physical fitness, education and social and self-awareness. Yoga moves beyond physical exercise and is a great tool for calming and controlling the mind and the senses. This, as you'll agree, is more relevant in the case of children who, almost without exception, are hyperactive and excitable by nature and need to be reined in.

Yoga is an ancient science and philosophy that has been practiced for thousands of years. The popularity of Yoga among kids is increasing gradually throughout the world. Yoga is not just for adults and the debilitated; it is a great way to usher tiny tots into a healthy regimen. Yoga is a very gentle form of exercise and there is not much fear of injury or of overdoing it, Children can start yoga from age five. A fifteen to twenty minute session is enough to get them started. This can be gradually increased to half an hour or more for older children. Starting from simple animal postures to meditating with the corpse pose, small children can enter the rich world of Yogasanas which will help them establish the body-mind-spirit connection. Without doubt, this will see them sail through every sphere of life smoothly.

In a research, it has been found that parents invariably do not pay much attention to the physical fitness of five-year-olds and above, as it is widely believed that children who cross the toddler stage are physically active anyway; but it is not necessary that they will sustain that lead for a long time. Soon other pressures - like sedentary habits required for academic work, and irregular and insufficient dietary intake - are bound to catch up and whittle away that advantage. Thus, we have number of obesity cases or underweight. Therefore, it is absolutely essential that we inculcate the habit of physical exercise - as distinct from sports and playground activities in our child.

Yoga for kids can benefit children in a large number of ways, by improving physical and general health, mental health and to helping to treat specific illnesses and conditions. The most common benefits of yoga for children are related to maintaining a healthy body and fighting illnesses. Easy yoga for children has shown to build stamina in those who practice it, aid stability and also improve general balance. It strengthens the child's muscles, elongates the spine and promotes good posture. Yoga has also shown to improve children's digestion and aid the elimination of toxins and aid circulation. Moreover, meditation can help them study for exams and cope with the stress and pressures of daily life.

Yoga, for kids, “empowers the soul to empower the body so that the child can grow with a feeling of wholeness” and reach her/his full potential. Early intervention enhances the healthy and natural development of infants and toddlers

Yogasanas are unique postures that involve stretching and bending which help in relaxing tensed or contracted body muscles. These poses carried out in slow, rhythmic repetition are extremely beneficial for toning the body and massaging the internal organs. They help in improving the overall immunity by restoring circulatory, respiratory and digestive vitality. It helps wayward children to get centered and more in tune with their inner selves. Yoga Asana for children and Pranayama are best when practiced in the morning.

Here, we have come up with some of the easy and effective yogasanas which can be included in the child's daily fitness regimen. Yogasanas are a set of postures designed to enhance health and put us in harmony with our inner consciousness, their ultimate aim is the attainment of a sustained and comfortable sitting posture to facilitate meditation. Gradually, Pranayama can also be included in the fitness program as it arouses the internal energy of a person and makes him healthy, balanced and active.

STANDING POSE

Palm tree pose or Tadasana:


Stand erect with feet joined together. Raise arms above the head and lock your fingers such that the palm is facing upwards. Raise the heels and stretch upwards as much as you can so that you feel the tension in arms, neck and shoulders. Hold the position for as long as you can. By each passing day you can hold the position a little longer.
Benefits: This is a good exercise for increasing height in growing children. It stretches the spine and is also good for toning the abdominal muscles.

Triangle pose or Trikonasana:


Stand erect with feet apart. Inhale and stretch hands and bring it to parallel to ground. With this as the base position, exhale and bend forward twisting to touch the right hand to the left foot. In this position, the left hand should be straight up and the head should be aligned to look up, too. Come back to the starting position and repeat on the other side. Initially, do it slowly for two to three times on either side. Once you get it then you can alternate between left and right without coming up to starting position and count 10 - 20 twists.

Benefits: This pose exercises the entire body - legs, arms, neck, shoulders, back, stomach - and tones it. It is good to alleviate constipation as it improves digestion.

SEATED POSE

Lotus pose or Padmasana:


This is done in the sitting position. Sit down and stretch your legs in front of you. Bring one leg, with the aid of your hands, to rest on the opposite thigh such that the heel touches the groin. The sole of the feet should be facing upwards. Bring the other leg to rest similarly on the other side. Hands should rest on the knees. Close your eyes and concentrate on the breathing.

Benefits: This calms and soothes the mind. It will help children become less excitable and increase their attention span. A child should learn to hold this pose for 1-2 minutes.

INVERTED POSE

Wind releasing posture or Pawanmuktasana:

Pavan Muktasana is the best asana to expel gas by compression of the abdomen.Keep your hands by the side of your body in a supine position. While inhaling, raise both your legs to 90 and bend them at the knees.Make a finger-lock with both your hands around them, a little below the knees. While exhaling, bring your thighs close to the chest by contracting the abdominal muscles. Maintain this posture for a few seconds.
Then return to the original posture in the reverse order. Repeat the asana three to four times.

Benefits: As the name suggests, this pose is very good to remove accumulated gases in the stomach and alleviate bloating and constipation. It massages the abdomen and tones up the back, waist and bottom.

PRONE POSE
Bow pose or Dhanurasana:


Lie flat on the stomach with arms on the side. Bend the knees and catch the feet with the corresponding hands. Raise the head, shoulders and chest off the ground and simultaneously the knees and thighs, such that only the abdomen is in contact with the ground. Hold this position for a while and then slowly release the hands and come down to the starting position.

Benefits: This pose is a good safeguard against gastro-intestinal problems and obesity. It tones up the spinal column, arms, legs - in fact, the whole body.

RECLINING POSE

Matsyasana


It is commonly known as the ‘Fish pose’. It exercises the chest, tones the nerves of the neck and back. Performing the Fish Pose also expands the rib cage fully, increasing your lung capacity and aids in deep breathing. Doing the Fish Pose also relieves the stiffness of your neck and shoulder muscles.

Firstly, Lie on your back on the floor with your knees bent, feet on the floor. Inhale, lift your pelvis slightly off the floor, and slide your hands, palms down, below your buttocks. Then rest your buttocks on the backs of your hands (and don’t lift them off your hands as you perform this pose). Be sure to tuck your forearms and elbows up close to the sides of your torso.
Inhale and press your forearms and elbows firmly against the floor. Next press your scapulas into your back and, with an inhale, lift your upper torso and head away from the floor. Then release your head back onto the floor. Depending on how high you arch your back and lift your chest, either the back of your head or its crown will rest on the floor. There should be a minimal amount of weight on your head to avoid crunching your neck. You can keep your knees bent or straighten your legs out onto the floor. If you do the latter, keep your thighs active, and press out through the heels. Stay for 15 to 30 seconds, breathing smoothly. With an exhalation lower your torso and head to the floor. Draw your thighs up into your belly and squeeze

Asanas (Postures) should never be practiced immediately after Pranayama (Rhythmic control of breath). If Pranayama is done first allow some time at least an hour to elapse before starting Asanas.

Here are some great animal poses your kids may enjoy:

When yogis developed the asanas many thousands of years ago, they still lived close to the natural world and used animals and plants for inspiration—the sting of a scorpion, the grace of a swan, the grounded stature of a tree. When children imitate the movements and sounds of nature, they have a chance to get inside another being and imagine taking on its qualities. When they assume the pose of the lion (Simhasana) for example, they experience not only the power and behavior of the lion, but also their own sense of power: when to be aggressive, when to retreat. The physical movements introduce kids to yoga's true meaning: union, expression, and honor for oneself and one's part in the delicate web of life.

Down Dog Pose


  • Stand with feet flat on the ground.
  • Slowly bend at the waist until your hands reach the ground.
  • Lean your body back slightly until you resemble and upside down V.
  • Bark, loudly, until the neighbors come over to find out what's going on.
Lion Pose


  • Sit on your legs with knees bent (basic hero pose).
  • Stick your tongue out as far as you can.
  • Breathe out with force while roaring like a lion
  • Do this several times.
Camel Pose


  • Sit on your knees
  • Reach behind your body and grab the soles of your feet (if you can).
  • Decide what kind of noise you think a camel makes...

Butterfly Pose


  • Start by sitting on the floor with the soles of your feet together.
  • Take a moment to relax all your muscles and let your knees sink closer to the floor.
  • Sit up tall, and hold your feet.
  • Begin to gently "flap" your legs up and down as if you were a butterfly. You can even pretend to be butterfly gathering nectar!

Cat Pose


  • Get on all fours.
  • Arch your back up really tall, as if you were an angry cat. The kids will probably enjoy hissing to complete the picture.
  • Gently let your back fall into a sway, then arch it back up again.
  • Mewing and hissing are greatly encouraged - come on, it's too fun not to!
Cobra Pose


  • Lay down on your stomach.
  • Place your hands directly by your chest.
  • Push your upper body upward as far as you can.
  • Now pretend you are a cobra and hiss!

All the ancient commentaries on Yoga stress that it is essential to work under the direction of Guru (Master/Teacher).The role of the Yoga teacher is of foremost importance if Yoga is to be successfully introduced to children. The Yoga teacher must be able to arouse curiosity in the pupils and create in them a desire to learn. He or she must inspire and enthuse the children and should be cheerful in the class. A Yoga teacher must, therefore have physical agility and mental sharpness. The teacher should be a keen practitioner of Yoga.

Children derive enormous benefits from yoga. Physically, it enhances their flexibility, strength, coordination, and body awareness. In addition, their concentration and sense of calmness and relaxation improves. Doing yoga, exercises, playing, connect more deeply with the inner self, and develop an intimate relationship with the natural world that surrounds them. Yoga for children is certainly one way to ensure that our children grow up healthy and happy. Children doing Yoga from early age get the benefit of staying healthy when they become adults.

Visit For Textbookonly.com For Books

Monday, July 6, 2009

Pranayama

Pranayama is very important technique in yoga which is control and extension of ‘Prana’ or Vital energy or Life force. Pranayama helps in management of our vital energy. It is highly effective to control various diseases and for highly influential lifestyle The Pranayama can be classified in two types in terms of physiology, Hypo ventilation or vitalizing Pranayama and Hyper ventilation or relaxing pranayama. Kapalbhati, Bhasrika and Fast breathing can be classified under Hyper ventilation (increases Oxygen and reduces carbon dioxide) and Deep breathing, Bhramari can be classified as Hypo ventilation (oxygen level remains mostly same but the speed of respiration is lower).

Pranayam arouses the internal energy of a person and makes him healthy, balanced and active. Pranayam package which has seven-steps is sufficient along with daily routine. In Pranayama, however, there is a systematic regulation of both the inhalation and exhalation. The entire Pranayam process takes around 45 minutes and the duration can be increased gradually upto two hours. Pranayama should be done in morning hours preferably before the dawn. One should not sit for Pranayama after meals. At least a gap of 3-4 hours is essential. Pranayama should be practiced after Asans and before Meditation. Body must be cleansed before performing Pranayam and one should wear loose clothes. Sit straight; keep the neck and head absolutely straight. If a person cannot sit on floor due to some reasons then you can sit on chair. The body should be stable and spine should be straight. These seven-steps of pranayam package can be followed daily to maintain good health. Place for pranayama should be clean, peaceful and airy.
Now, we are going to discuss the seven most influential breathing exercises.

Bhastrika:

Take deep breathes and fill the lungs with air and then release it through nose. Take deep breath but do not fill the air in the stomach. Inhale deeply and exhale completely so that the lungs become free of air. Repeat this for 5-10 times till your breathing system is perfect. However, the patients of high blood pressure and heart patients should do it slowly. During this breathing exercise, imagine that you are throwing all the disorders present in your body. The mind is becoming pure and pious. Practice pranayam from three to five minutes.

Kapalbhati:

It is a double-nostril exercise of exhalations done at the rate of one per second. Mentally focus on exhalations and not inhalations, which will happen automatically. The idea is to throw the bad breath loaded with carbon dioxide out. This ensures quick replacement of the toxic gas with the refreshing oxygen needed for cellular metabolism.


  • One can sit in vajrasana or padmasana.
  • Placing the hands on the knees, keeping the back upright, while the eyes looking straight ahead.
  • Exhale forcefully through the nose while pushing the stomach inward.
  • Inhalation should be passive and short.
  • Quickly perform the next exhalation.
  • Do this continuously to a rhythm.
  • Practice this with 50 exhalations at a stretch, then increase to 100.
  • Subsequently, perform this for 2minutes continuously and increase the duration.

‘Kapalbharti’ enables the inhalation of a good amount of oxygen which purifies the blood and strengthens the nerve and brain centres. This kriya provides relief in many lung, throat and chest diseases like chronic bronchitis, asthma, diabetes, pleurisy, and tuberculosis.

Bahya pranayam:

Keep the hands on the knees; bend the chin and try to touch the upper portion of the chest and the chest should be stretched. The stomach muscles should be pulled inside.

The muscles of groin area should also be pulled inside. Then breathe out completely like Kapalbhati. Imagine that the disorders are going out of the body while breathing out. The time taken for each repetition is 15 seconds and this should be done for at least three minutes.


Anulom-Vilom:

It is a single-nostril breathing exercise. It is very influencial breathing exercise for diabetes, hypertension or high blood pressure, migraine pain, asthma. One can begin with a minute of deep but slow breathing. In all breathing exercises, the hands must rest on the knees. Eyes must be closed. Inhale through the left nostril while keeping the right nostril pressed with the thumb of the right hand. Follow this by exhaling through the right nostril while keeping the left nostril pressed with the middle fingers of both hands. The aim is to achieve 100-120 inhalations and exhalations over a five-minute period. Stop for a moment if you are tired. By doing this anulom vilom pranayam for about 15 minutes a day you can cure diseases like Hypertension or high blood pressure, Diabetes, Migraine Pain, Asthma, Bronchitis etc.

  • Sit in padmasana or sukhasana or legs folded in a proper manner
  • Keep back erect.
  • Shoulders behind.
  • With right hand, close index finger & middle finger.
  • Keep right hand thumb for controlling right nostril.
  • Keep right ring finger for controlling left nostril.
  • Now the actual breathing procedure
Breathe in through left nostril
Breathe out through right nostril
Breathe in through right nostril
Breathe out through left nostril.

This is one cycle of Anulom Vilom.

Both Anulom-Vilom and Kapalbharti are done for five minutes each by the beginners. They need to be extended up to fifteen minutes or more over a period of time through practice.

Brahmari: Person should sit in Sukha Asana or dhyan asan, close his eyes , keep his fingers in such a way that three fingers cover the eyes and one finger gives a little pressure on the forehead . The thumb should cover the ears by giving the little pressure. Now he has to take deep breathe and release the air slowly through nose so that a sound similar to the humming of bees comes out. Repeat the process for about 15 minutes. Breathe in and breathe out and imagine that the divine energy is entering into the body.
By doing Bramari pranayam you can cure all diseases related to ears, nose, throat, eyes, and nervous system.

Udgeet: A person should sit in Sukha Asana or dhyan asan, close his eyes, take deep breathe and release the air through mouth slowly that the sound of “OM” is pronounced. Breathe normally and chant ‘Aum’. The breathing should be so simple that the sound of breath should not be heard and even cotton kept in front of the nose should not move. Chant ‘Aum’ and visualize it while practicing this pranayam. Repeat the process for about 15 minutes. By doing udgeet pranayam you can cure all diseases related to nervous system and Throat.

Meditative pose: Concentrate the mind on inhaling and exhaling and think of god. God has created our eyebrows, eyes, nose, ears, lips, heart etc. in ‘Aum’ shape (Hindi word). Imagine the presence of god in every particle and meditate. Deeper the experience, and deeper will be the physical, mental and spiritual energy.

Pranayam overcomes the physical disorders, gives good health and the devotee proceeds on the path of spirituality.

Thursday, July 2, 2009

Yoga for obesity


Are you overweight? Running out of money after spending in weight loss programs? Still wondering how to reduce? Then you have clicked the right site which discusses the god-sent form of exercise, Yoga, to reduce weight naturally.
This ancient form of exercises began in ancient India many thousands of years ago. Once considered a lost art, it has slowly regained its prominence and popularity and has now spread far and wide from the lands of its origin. In fact yoga is even more relevant in our modern lives than ever before. It has been helpful in controlling various pains and diseases and found to be very effective in keeping the body fit.
Obesity is the excessively high amount of body fat in relation to lean body mass. It originates when the calorie intake is greater than the amount of energy the person burns. The root cause of Diabetes and other serious medical conditions is Obesity which has affected 60% of the American population.

Obesity may be caused by genetic factors, though some psychological, environmental, and some other factors also play a role. Obesity may run in the family or may be caused by lack of activity or a sedentary lifestyle. Some people also eat as a way to cope with some psychological disturbance. Other cases are due to binge eating or the feeling that one cannot control how much he is eating. Illnesses like depression and certain neurological ailments can also lead to overeating.

Obesity is highly preventable through proper diet, exercise and lifestyle change. Yoga Lifestyle is most suitable to facilitate treatment of overweight. The Yoga principle i.e Healthy Diet and the practice of the Asanas helps to balance the endocrine system, tone the abdominal organs, stimulate both the nervous and circulatory system, and reduce stress. Yoga also helps one to gain a better understanding of ones self, leading to acceptance and appreciation which will help eliminate the psychological reasons for Obesity. The practice of Yoga deals with all the aspects of an individual- the mind, body and spirit, giving a person control over his mind and body and making the effect is more permanent than other techniques.

Yoga definitely has an important role in obesity treatment. There are various yoga postures that specifically help in reducing body weight and restoring healthy conditions of the mind and body. Certain postures such as the fish posture and shoulder stand, specifically influences the thyroid gland, helping in converting fat to energy, resulting in increased muscle tone and better vitality. Also postures such as bending forward, backward twisting, etc., help in toning up the abdomen, hips and waist. When such postures are practiced several times regularly, it naturally leads to weight reduction.

Here, we wish to discuss some basic Asanas or Yoga Poses for Obesity

Sun Salutation or Surya Namaskara, has a profound effect in obesity management. Practicing Sun salutations regularly will help in toning up the muscles and internal organs, stimulates blood circulation and improves breathing, along with relaxing the mind. The practice of Sun salutation is a sequence of 7 asanas practiced in order which tones almost all of the muscles and also internal organs are stretched increasing blood & oxygen supply to these parts. Regular practice of sun salutation with breathing gives good exercise to the lungs.


Pawanamuktasana(Wind Liberating Pose)


This asana regulates the wind in the body. It brings the wind down, so that it can be easily exhausted through the anus. The wind then does not cause disorders in the stomach, and constipation is also relieved. It also helps in keeping away the diseases of the lungs and the heart. Obesity and excessive fat of the abdomen also diminish.

Keep your hands by the side of your body in a supine position. While inhaling, raise both your legs to 90 and bend them at the knees.
Make a finger-lock with both your hands around them, a little below the knees. While exhaling, bring your thighs close to the chest by contracting the abdominal muscles. Maintain this posture for a few seconds.
Then return to the original posture in the reverse order as Ardha Pavan Muktasana. Repeat the asana three to four times.

Shava Asana (Corpse pose)

Shava Asana (Corpse pose) allows you to mentally reach out to every part of your body and help it to relax. Those who have tried this technique for the first time have been truly amazed at the sense of deep relaxation that this magical Asana induces. The best part is that it doesn’t involve any complicated procedures. All the Shava Asana requires you to do is to lie on your back with your eyes closed and then slowly focus your mind on different parts of your body in order to make them relax.

Sukhasan


This asana is performed by sitting with the sit-bones on the front edge of a firm cushion or folded blanket. The hips should be elevated 4-6 inches. Cross the legs inwards starting with the left leg in first and then the right leg. Allow the knees to separate, crossing the shins and sliding the feet under the opposite knee. Maintain a comfortable gap between the feet and pelvis.
Secondly, rest the palms on the knees. Begin to find balance over the pelvis. Come lightly forward onto the sit-bones preventing the body from leaning back and rounding the spine. Keep the bottom front ribs slightly pulled down as the sit-bones begin to reach down into the cushion. Discover the feeling of neither arching forward nor leaning back, but simply balancing the spine over the pelvis.
Now, you can feel the thighs roll outwards and the knees move down towards the ground. Then, inhale and lift up through the spine through the top of the head. Exhale and relax the shoulders. Broaden the chest and collar bones without becoming hard between the shoulder blades.
Relax and close the eyes. Very slightly, you can lower the chin without excessively tilting the head forward. Relax the facial muscles, the jaw, and the nostrils. Allow the tip of the tongue to touch the roof of the mouth at the back of the front teeth.
Moreover, breath slowly through the nostrils for as long as it is comfortable watching the rhythm of the breath. Maintain the sensation of grounding through the sitbones and hips as the spine lifts lighter. To exit, straighten the legs forward and give them a shake. Repeat crossing the legs the opposite way.

Halasana


Halasana is a very important asana as it relieves constipation, and improves digestion. It keeps healthy thyroid and parathyroid glands and helps in preventing diabetes mellitus.
Lie flat on the back with the arms straight and beside the body, palms facing downwards. Keeping the legs straight, slowly raise them to the vertical position above the body. Only use the stomach muscles to raise the legs. Do not use the arms. Simultaneously, bend the trunk upward, hip first. Slowly lower the legs over the head and touch the floor with toes of both feet. Keep the legs straight, bend the arms and place the hands on the back as in sarvangasana. Relax the body. Remain the final pose for a comfortable period of time
Matsyasana – It is commonly known as the ‘Fish pose’. It exercises the chest, tones the nerves of the neck and back. Performing the Fish Pose also expands the rib cage fully, increasing your lung capacity and aids in deep breathing. Doing the Fish Pose also relieves the stiffness of your neck and shoulder muscles.
Lie on your back on the floor with your knees bent, feet on the floor. Inhale, lift your pelvis slightly off the floor, and slide your hands, palms down, below your buttocks. Then rest your buttocks on the backs of your hands (and don’t lift them off your hands as you perform this pose). Be sure to tuck your forearms and elbows up close to the sides of your torso.
Inhale and press your forearms and elbows firmly against the floor. Next press your scapulas into your back and, with an inhale, lift your upper torso and head away from the floor. Then release your head back onto the floor. Depending on how high you arch your back and lift your chest, either the back of your head or its crown will rest on the floor. There should be a minimal amount of weight on your head to avoid crunching your neck. (For more about this, see the Beginners Tip below.)
You can keep your knees bent or straighten your legs out onto the floor. If you do the latter, keep your thighs active, and press out through the heels.
Stay for 15 to 30 seconds, breathing smoothly. With an exhalation lower your torso and head to the floor. Draw your thighs up into your belly and squeeze

Pranayama


Pranayama is very important technique in yoga which is control and extension of Prana or Vital energy or Life force. Kapalbhati, Bhasrika & fast breathing can be practiced by people suffering from obesity with good effects; these Pranayama techniques increase the lung capacity and help burning fats. Regular practice of Pranayama brings balance in the system in terms of Physical and Mental functions.
Agnisar

It helps in getting rid of the abdominal fat and stream line the digestive system. Fast movement of abdominal muscles in and out, is very good exercise to get rid of the accumulated fats in the abdominal region also it helps in streamlining Digestive system.
Sit on Padmaasana or Sukhasana in a well ventilated room free from any distractions. Keep the waist, back, neck and spine erect. For the beginners, you can sit on a chair or sit cross legged on the yoga mat keeping your back, neck and spine erect.
Inhale and fill your lungs to maximum capacity. Hold your breath and practice Moolbandh (Contracting the anus muscles upward towards the large intestines).
Exhale slowly. Now while holding your breath pull your abdomen muscles (navel) inwards towards your spine, then release your abdomen muscles. Without inhaling keep on doing this flapping movement for the stomach as long as you can hold breath. Keep holding the Moolbandh while you are flapping the abdomen muscles.
Release Moolbandh and inhale.
Practice this for 2-3 times. Gradually increase the repetitions.
Yoga positions or postures are especially useful to reduce the fats in various parts. Increase in weight is a gradual process. The weight doesn't increase suddenly. We may overlook this, as this increase is not noticeable initially. But beyond certain limits this overweight may become reason for various diseases like Hypertension, Diabetes, Heart problems. So we need to control the weight from the beginning. Controlling one’s diet by intake of more raw fruits, and vegetables and avoiding processed food along with regular practice of yoga, has helped many individuals in dealing with obesity the right way. Regular practice of Yoga can certainly reduce the obesity and weight loss

Visit : Textbookonly.com for books.